Showing posts with label how to. Show all posts

Wednesday, December 11, 2013

Easy and cute semi-updo hair tutorial


One day my friend Cassidy was rockin this super cute semi-updo that looked perfect for either a casual day or even a special event. When I said I loved her hair, she was like, "Oh it's so easy and quick to do. It's my go-to hairstyle. I'll have to show you how I do it sometime."

So I not only took her up on that offer, but decided it needed to be a hair tutorial blog post, too. you're welcome!

What you'll need:
• about 5 minutes
• preferably semi damp hair
• a comb (if your hair doesn't part naturally)
• a hairband

See, it's already looking pretty easy!


Step one: After your hair is parted to one side, choose the side with the larger amount of hair and take a small section of hair from roots. You will then twirl this piece of hair back and then hold it with that same hand.


Step two: Use your other hand to take the next small section of hair underneath what you have already twirled back (which you are still holding). Wrap this new section of hair around and into what is already been twirled.


Step three: Again, you're taking your free hand that is not holding what you have twirled back and using it to grab the next small piece of hair at the base of your hairline and twirl it into what has already been twirled.


Step four: You continue this process of pulling new pieces of hair under the large portion that has already been twirled and along the base of your hairline, and then adding those pieces into the twirled hair.


Step five: Eventually you will have all of your hair twirled into one big piece and there will be a pretty "crown effect" going around the bottom of your hair.


Step six: Using a hairband, secure everything you have twirled together in one piece into a low bun.

Ta da! Now you're looking cute and put together, whether you're all dressed up for a night out at an upcoming holiday party or if it's just another day at work.


Pin It!

ps. HUGE thanks to Cassidy for sharing her tips and agreeing to let me photograph her for this post! 

Friday, August 9, 2013

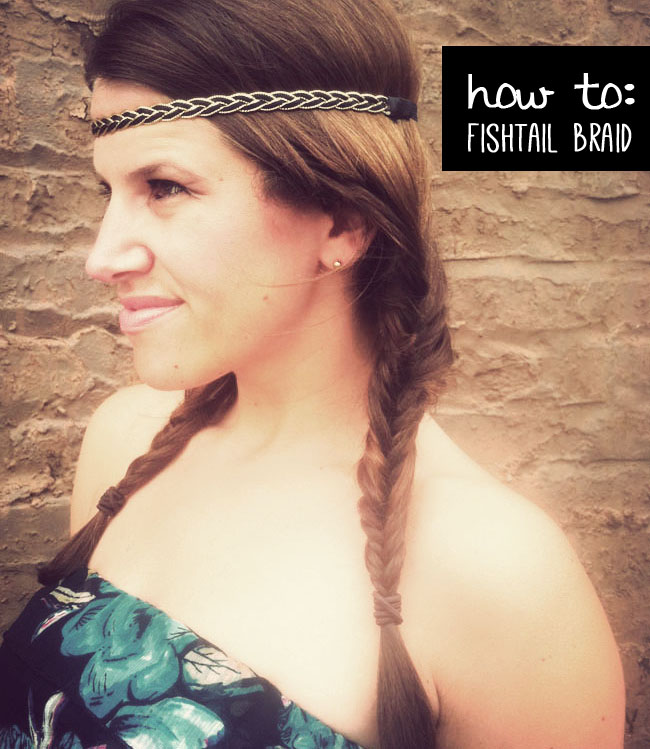
How to: Fishtail braid your hair (in pigtails)


I have loved the fishtail braid since it debuted way back whenever that was. But I am honestly not great at doing my hair and am about as low maintenance as it comes in that area. Just looking at the intricate braid detail on others, I just passed it off as too difficult and yet another hair style I couldn't do.

Then one day at the climbing gym, I was chatting with Rachel about braids and she said it was actually pretty easy to do a fishtail braid and explained it to me. I thought it didn't sound too bad after all and maybe I should try it just to see.

I was blown away that I could actually fishtail braid and figured if I could do it from just having someone explain it to me, then I could pass this knowledge on to my readers with photos to help illustrate!

So here goes!


First, here are the teeny amount of supplies you'll need. This alone should tell you what an easy process the fishtail braid is. I mean, you only need a comb and some hairbands. You'll need two hairbands that you don't mind cutting to remove from your hair. The other two hairbands will stay in your hair at the bottom of the braid. The clear bands are best, but for photo purposes I chose brightly colored hairbands for this tutorial.


Step 1: I prefer to do pigtail braids because I have so many layers and bangs that are growing out that  it's almost impossible for me to keep a single braid in tact all day long. If you are doing a single fishtail braid to one side, you can obviously skip this step.

If you do pigtail braids, simply part your hair down the middle and bring each half of hair to the front of your shoulders.

Step 2: Simply use the comb to smooth out your hair and remove any tangles.


Step 3: Use hairbands that you don't mind cutting later (and throwing away) to put your hair into regular pigtails. The closer you can get the hairband to the base of your head, the longer your braid will be. It's also best to get the hairband of the pigtails in the same spot on each side (which I obviously didn't accomplish here).

Helpful Tip: Use a mirror. It may seem obvious but braid your hair in front of a mirror. Because it takes a bit of time to do this, it's tempting to watch tv while you braid. But using a mirror allows you to see how even your pigtails are and also how even each strand is that you pull apart. The more even each strand is, the prettier your braid will be.


Step 4: Take one of the pigtails and separate it into two equal pieces. I will call these Side 1 and Side 2.


Step 5: Separate a small strand of Side 1 and pull it away from that bunch of hair.


Step 6: Take this small strand from the outside of Side 1 and cross it in front of Side 1 to meet the inside of Side 2. This means that Side 2 has just a little bit more hair than Side 1 now.


Step 7: You will now repeat this action with hair from Side 2. Take a small strand from the outside of Side 2 and cross it in front of Side 2 to meet the inside of Side 1. Now each side should have an equal amount of hair.


Step 8: Continue this process of pulling an outside strand from one piece across and into the inside of the adjacent piece of hair until you reach the bottom.

Helpful Tip: Allow for plenty of time. Fishtail braiding is a fairly time intensive hairstyle. You don't want to feel rushed when doing this. I might be slow, but it takes me about 10 minutes to complete each braid.


Step 9: When you have your braid as long as you want it, use a hairband (clear is best, or one that is similar to your own hair color) to secure your hair at the bottom. You will now repeat this process on the other pigtail.


Step 10: Cut the hairband you used at the top of each pigtail braid to remove it from your hair without messing up your braid.


Photos: Leslie Evans


Pin It!