Friday, March 29, 2013

What to wear: Birthday Parties


In honor of my friend Amy's birthday (tomorrow!) I thought I'd do a little post about what to wear to
birthday parties.

Quite frankly, there are so many different ways that birthdays can be celebrated, that it's hard to narrow
my choices down to just nine options. But I actually think there is something in this lineup to inspire you
on how to dress for celebrations including an upscale birthday dinner out to a laid back and casual fun-filled
day crammed with lots of activities—and everything in between, too!

Happy birthday Amy! Can't wait to celebrate you...in style!


Thursday, March 28, 2013

Lost rings and other things


So I'm kinda flipping this week because I seem to have misplaced I am an idiot and I've lost a couple of my favorite pieces of jewelry. I'd really like to blame all my gym visits and putting rings on and taking them off several times a day, but still. How difficult can it be to keep up with two rings? I've never been good with taking care of my jewelry though; my mom can attest to that.

Speaking of my mom, I'd like to give her a shout out for supplying this shoot with two pretty incredible items. Both my dress and my clutch came from her store Oopsy Daisy. I absolutely love both pieces separately, but they look kind of amazing put together, no?

Ok, so if you'll just please excuse the fact that my fingers are a little naked in this outfit post, that would be great. Really hoping I find them hanging around somewhere in my car. I definitely miss need them...until then (naked) fingers crossed they show up soon!

Here's the cheapskate outfit breakdown:

1. Navy dress, c/o Oopsy Daisy (thanks mom!)
2. Pleather jacket, Know Style ($39.99)
3. Leaf belt, Necessary Clothing ($5.99)
4. Gray sheer tights, ?? (??)
5. Blue shoes, Necessary Clothing ($19.99)
6. Mustard clutch, c/o Oopsy Daisy (thanks mom!)
7. Vintage RayBan sunglasses, gifted (thanks mom!)
8. Triangle Earrings, Urban Outfitters (gifted, thanks Joy!)
9. Circle ring, Brooklyn Flea ($5.00)

Total: Under $100


Photos: Leslie Evans


Pin It!

Wednesday, March 27, 2013

Splurge on: Scarves


I love scarves. I mean, who doesn't, right?! I really should wear them more often. Especially right now, seeing as how they are the single best item to help you transition between seasons. Scarves can add a pop of spring time color without being too overwhelming and they provide warmth when you need them, but are also just as easily removed. Basically, scarves are the essential layering piece.

So here are a few that I've got my eye on.

1.  Old Navy Floral Gauze Scarf, $14.94
2.  Morgan Striped Scarf, $16.11
3.  Forever 21 Neon Ganado Print Scarf, $8.80
4.  Merona Yellow/Gray Polka Dot Scarf, $14.99
5. ModCloth Hint of Mix-tery Scarf, $21.99


Pin It!

Tuesday, March 26, 2013

Buy this, not that: Emerald earrings


Yeah, these earrings from My Jewelry Box might look familar seeing as how I just picked them for my March piggy bank picks. But I saw a similar pair featured on either Lucky or WhoWhatWear (sorry, my fashion lines start to blur I look at so much stuff!) only the price was much higher, of course.

Seeing as how emerald green is supposed to be a hot new color for spring, I thought I'd just point this pair of earrings out one more time in case you were looking for something similar to the beauties created by Lulu Frost, but need it to be more in your budget. 


Monday, March 25, 2013

Music Monday: Lucius & David Ramirez


Sometimes you seek out shows. You know you love the band and you've spent weeks waiting for them to come in town. Then other times you have a crazy bit of luck where you stumble upon a show and witness a bit of magic.

I have to admit that's exactly what Lucius was for me. I actually went to Workplay to see The Mowgli's, but it was the opening band (Lucius) that I enjoyed more...way more. (side note: I actually ended up not liking the mowgli's live. I'm just not one for that much..."energy." It all seemed a bit much and showy. Put me off completely.)

Anyhow, I was intrigued at the get-go when I walked into Workplay and saw the matching peplum jumpsuits the girls of Lucius were wearing, along with their sci-fi-ish updo hair styles. But it was their mind-altering harmony that really did me in. Then fast forward to ending the set with the quintent (2 girls, 3 boys) coming down to the floor (literally) to sing acapella and play drums with the ground and beer bottles...I was a goner. I can't help it. Accoustic endings and using odd items as instruments are my musical kryptonite. I will definitely be on the lookout for these guys to come back to the Ham.

Lucius ending their set on the floor.


I went back to Workplay on Friday night to see David Ramirez perform. I get the feeling I will be on a first name basis with the door staff here pretty soon. They definitely recognized me. I'm a music junkie, what can I say?

Anyhow, it was worth the trip. David Ramirez was pretty amazing. He has this powerful, full, round and beautiful voice that draws you in and leaves you hanging onto and believing every single thing he says. I think in one word you'd call that "genuine," but we all know brevity is not a strength of mine.

There's also something about his sound that makes me feel like I should be in car traveling across the country while listening to his music with my windows down. Who knows? Hopefully one day maybe I will. He does at least have an EP coming out in May called The Rooster. So that's a good start. And he has also started chronicling his adventures on the road, which I for one am psyched about. I mean who hasn't ever wanted to go along for the ride with a musician? Well, now you can. Sort of.

David Ramirez at Workplay


Friday, March 22, 2013

What to pack (+ tips!): Disney World


So i'ts been almost a month since I went to Disney World with the fam and I am just now getting around to posting about it. Go figure. Anyhow, while I was there I took a few notes in case anyone else out there was planning a trip and needed some tips. Below are a few of my suggestions.

Best time of year to go: Mid January - Early March. We went at the end of February and for the most part the weather was great. It was only really cold our last day there. But if you go during this time, definitely pack some layers! It'll be chilly in the morning, then warm up, then cool off again after sunset. Oh and the lines were not bad at all either.

Stay on the resort, buy the meal plans. It may seem like extra money spent, but it is well spent. Completely worth it. And that's coming from me, a cheapskate! But I also prefer to spend what I can up front so that there's no "surprise" costs along the way. It was also nice to have a bus take us to the parks each day and drop us off. And did I mention you get a free refillable mug to use at your resort?!

Make reservations. However, if you do get a meal plan, definitely make reservations for your "sit down" meals. They advise you make these at least 6 months ahead of time. I know, it sounds crazy, but just trust me on this one.

Bring your own stroller. My brother and sister-in-law had contemplated renting a stroller once we arrived at each park, but ended up buying one from Craigslist instead. Greatest decision ever. It was a little bit of extra work to bring it on the bus each morning, but it was definitely a better option than stopping every morning at the park to pick up a stroller and then returning it at the end of the day. Plus our stroller actually had places to put bags, backpacks, etc. The Disney versions we saw were very minimal. Pretty much just hard plastic.

Pay attention to park hours and magic hours. If you stay on the resort, you get "magic hours" at the parks. These are hours of the day that only those who stay on the resort can ride rides in the park. These times change every day as to which park has the magic hours and whether they are in the morning or evening. Knowing these will help you plan your days and time better.

Entertainment options for smaller children. My niece Callie is just a year and a half, so she was unable to ride a lot of the rides. Instead, we all took turns hanging out with her at the entrance of a ride, while the others would go first. If you need to entertain while the rest of your party is in line, check out the exit of that ride. There are usually gift areas or game type areas that riders have to exit through. It's cool inside and there's plenty in there to entertain little ones.

Rider pass. Also, you can get a rider pass at Magic Kingdom if you have a small child that cannot ride. Basically it allows you to switch off "babysitters" quickly. With a rider pass, you get to jump line and board the next ride after the other half of your party has exited and can trade places with you.

My favorite rides: 
• Toy Story Mania (Hollywood Studios)
• Rock n Roller Coaster (Hollywood Studios)
• Twilight Zone Tower of Terror (Hollywood Studios)
• Soarin' (Epcot)
• Test Track (Epcot)
• Space Mountain (Magic Kingdom)

Helpful apps:
• Disney World app from Touring Plans (gives wait times, FastPass info, etc)
• Walt Disney World Maps and More (GPS option for each park) 

Bring a first aid kit. You don't need every single type of medicine, but definitely bring a bag in the park packed with stomach medicine, Tylenol, band aids etc.

Prep for the next day, the night before at the hotel. First, get plenty of rest. I don't think I have to explain that one, but just know that everyone will be in better moods the more sleep you have. Second, be sure to group everything that you plan on taking in the park the next day, all in one memorable place. Things like sunglasses, cameras, jackets, etc. Also, charge batteries for video cameras, etc at night while you are sleeping.

Get up 15 minutes earlier than you think you should. This should really just be an everyday of life rule. But don't worry, I don't follow this one either!

Treasure the magical moments. I say this because when you visit Disney, you are usually traveling with family (which means you're prob gonna lose your patience quicker) and small children (who get hungry, tired, hot and cranky—oh wait, maybe I am referring to myself?). But if you just remember to treasure the magical little moments along the way, you will leave with a much better experience.

For me these magical moments include: 
• Witnessing my nephew Cade rode his first real roller coaster (space mountain)
• Seeing Callie's eyes during the fireworks at Magic Kingdom
• Holding Cade's hand in line at It's a Small World
• Watching Callie point at everything during It's a Small World
• Swimming in freezing cold water with Cade bc he just wanted to go to the pool so badly
• Carrying a sleeping Callie in my arms halfway across Epcot to ensure she wouldn't wake
• Slumber party every night with Cade in our murphy bed
• Noise contests with Callie
• The projection show on Cinderella's castle
• Sharing a late night laugh with my mom and Nikki about Cade's magic potion

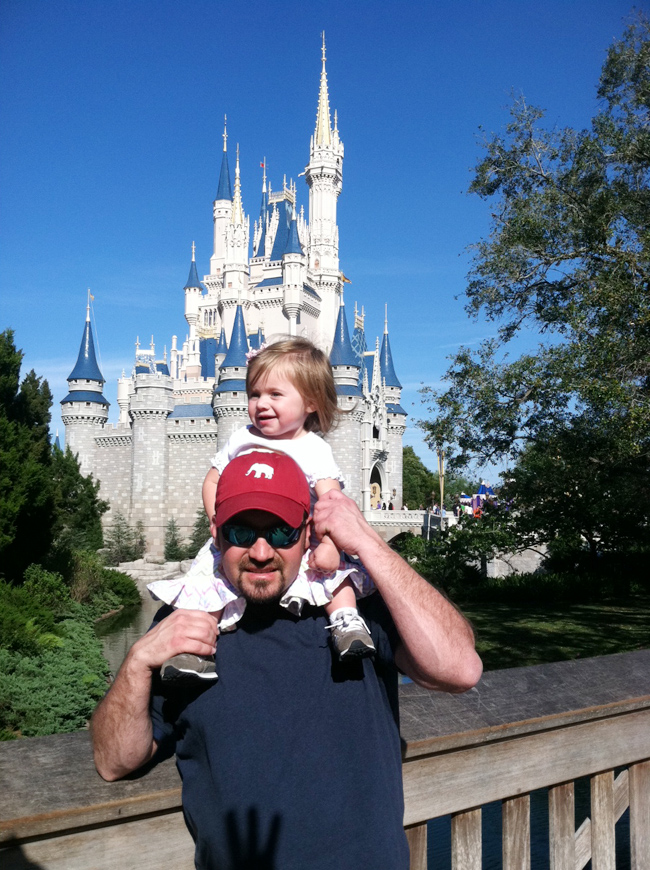
Here are a few photos for me to leave you with! Enjoy!


Pin It!

Thursday, March 21, 2013

My "go-to" concert outfit


I've noticed recently that I seem to develop a type of "uniform" for certain events. Or even day-to-day for that matter. It just helps the the time spent in front of the closet go a lot faster if you have a few "go-tos" handy.

So today I present you with my "go-to" outfit that I wear attending shows around town, particularly in the cooler months. Basically it consists of a dress, a button down to act as a jacket (I can remove this if it's warm inside) and comfy shoes for standing/dancing. Cowboy boots are a classic for me—they give a little bit of height, are cute and my feet don't hurt to stand in them for a couple of hours.

A tiny cross body bag is perfect for carrying a phone, gloss, ID, cash and your ticket, plus it's lightweight and won't annoy you. Add a couple pieces of jewelry and possibly even a fun boho braid somewhere in your hair and you're ready for a good time!

Here's the cheapskate outfit breakdown:

1. Strapless floral dress, TJ Maxx ($14.99)
2. Vintage chambray button down, thrifted ($4.99)
3. Cowboy boots, Kohl's ($32.99)
4. Cross body bag, thrifted ($3.00)
5. Sunglasses, Urban Outfitters ($10.00)
6. Heart locket necklace (had since I was child)
7. Star necklace, Etsy ($12.00)
8. Leaf ring, gifted (thanks Em!)
9. Circle ring, Brooklyn Flea ($5.00)

Total: Under $100.00


Pin It!

Tuesday, March 19, 2013

Design project: Bridal tea invitations

A month or so ago I was approached about designing bridal tea invitations for a girl who's getting married soon down in New Orleans. The client wanted the invite to be "tea" themed since they were going to be holding an actual tea for Claire—the possibility of hats included!

So I pulled the beautiful shade of green Claire is using for her wedding day and a couple of other colors suggested by my client, grabbed a few tea appropriate images and viola! A lovely ladylike tea invitation was created.


Pin It!

Monday, March 18, 2013

Glass jars as vases


I know I've mentioned before about my hoarding habits inability to throw away reusable items like glass jars. There's just entirely too much that you can do with them.

They are so versatile, but one of my favorite uses definitely has to be as a vase. So when a few of us were hosting a shower for Ashley and my friend Amy said she had an idea for vases if I had any mason or other glass jars, I couldn't wait to see what she had come up with.

It was honestly just as easy as cutting out paper to wrap around the jar, use clear tape to fasten it together and then finish it off with either a piece of ribbon or twine. It's such a simple idea but works incredibly well. (In fact, simple ideas are my favorite. They mean less time and work involved!)

By using paper and ribbon with the colors of Ashley's upcoming wedding, we were able to keep a consistent theme and it also added to the decor element of the shower. Not to mention these were items that we already owned, so there's less cost involved, too. Such a fab and easy project to try for your next event.


Pin It!

Friday, March 15, 2013

Life lately


Life lately has been quite a blur for the past three weeks. I've had two friends visit from out of state (woohoo!), ran a half marathon, hosted a lingerie shower, attended a bridal tea, took a week long trip to Disney with my family, squeezed in a lunch with one of my old college roommates while I was at Epcot and made countless memories with my niece and nephew while there, too.

Throw in a small bday celebration for Nicole, a bridal makeup party, planning/attending an after hours party for work and then also working a few track meets and you've got one tired, but fulfilled lady! It's been an exhausting jam-packed month, but sleep is for when you're dead, right?


Thursday, March 14, 2013

Buy this, not that: Mint green bag


So I have a confession to make. When I made my fashion picks for March, I really wanted to include the above mint green bag I found on ASOS. But I looked at the other items I had already gathered and realized I probably had already chosen enough mint green items recently. Clearly I have an obsession :)

But then I saw this article from Lucky magazine and they had chosen a Loeffler Randall bag almost identical to the original one I loved. Only the price tag has an additional digit on it. The similarity was so fantastic that I thought I should showcase these two items in a "buy this, not that" post. Don't get me wrong, if I could afford the other bag, I'd take it! But since I'm more of a "finding-a-steal" than "making-a-splurge" kind of girl, this ASOS bag is the pick for me.


Pin It!

Wednesday, March 13, 2013

Do it yourself: Refinished Furniture


When you hear the words "refinished furniture" it sounds like a pretty daunting and difficult task. But it's actually quite an easier and less painful process than you might imagine. Or it was for me anyhow!

As a gift to my best friend Ashley for her upcoming wedding, I wanted to give her something she really needed and could use pretty much everyday. After realizing that what she and Nick needed most was furniture, I decided the most afforable way to give this gift to them would be to buy an older piece and refinish myself (with the help of mom and dad, of course!). Plus you know I love to make gifts because it just feels like more love goes into them :)

My mom ended up finding a great deal on a local website listing and we were able to get two end tables for Ashley's living room for $40 total. With my supplies (listed below) I ended up spending right at $50 for a gift that they can use for a long time, or they could always sell it at some point, too.

Supplies needed:
• One quart latex paint  ($9.88)
• Paint brushes
• Sand paper
• Dual action sander (optional)

Time spent: Approx. 5 hours

Money spent: Under $50

As I said earlier, the process itself is pretty easy. It's just sand and paint. Or at least in our case, this was the route we decided to use. You can also stain furniture and even paint and then distress the paint job afterward. But let's just focus on this particular project for now.


Here's our before photo. As you can see there was a pretty hefty amount of damage on this piece, but nothing that couldn't be sanded out. So that's our first step.


When you sand, be sure to start with hand sanding. In our case, we needed to get a few spots sanded down further than what good old fashioned elbow grease could do, so we also used a dual action sander after we hand sanded everything. (dual action sanding not pictured)

Also, be sure that when you hand sand, you sand with the grain of the wood.

After you're finished, wipe the furniture clean of all dust and even use an air compressor to blow away dust if possible.


After everything is smooth, now all you have to do is paint. I chose this dark Java Brown shade of Valspar for this piece of furniture. It was a color that looked similar to something I knew Ashley liked and the brand was recommended by a professional at Lowe's

Quick Tip: If possible, elevate your piece of furniture onto another object. This will help the painting process go quickly. And as with sanding, also be sure that you paint with the grain of the wood. 

Once you have one coat of paint, let it dry and then apply a second coat. This particular brand did not take long at all to dry. We basically ate lunch and then it was time for the second coat. 

That's pretty much it! If you are a real perfectionist (like my dad) you can also use a paint sprayer on the  most exposed parts of the furniture to ensure that there are less brush marks in the final paint job. 


Here's our after photo. I think it turned out great and I can't wait for Ashley and Nick to finally see it in person and get to use the end tables in their new apartment!


Pin It!